Patching the BIOS of a WatchGuard T70 to Remove the Password
31 Aug 2025in the last post, we explored how to run linux on a watchguard t70. while it’s quite useable as is, the bios password is a bit of an annoyance. so, let’s patch the bios to remove the password check entirely.
Recap
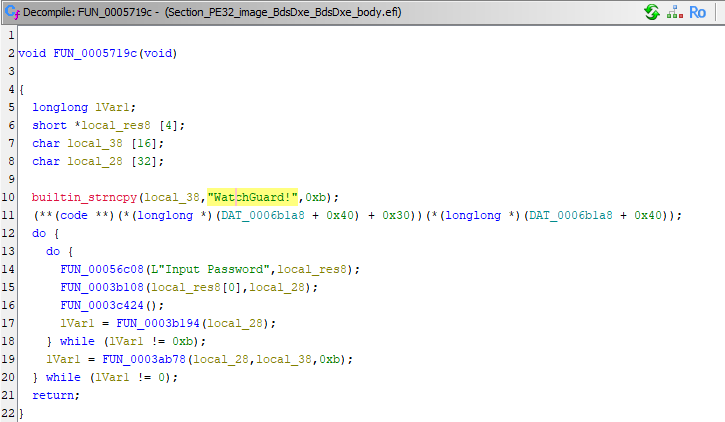
from the previous post, we already have the bios image extracted and loaded into ghidra. we also already found the password check function, which is how we know the password in the first place.
 |
|---|
| the password check function |
Removing the Password Check
looking a bit closer at the function, we can see some convenient details that make our job easier:
- the function only has a single call site
- the function doesn’t have a return value
- the function doesn’t take any parameters
- the function doesn’t have any relevant side effects (other than showing a prompt on the screen)
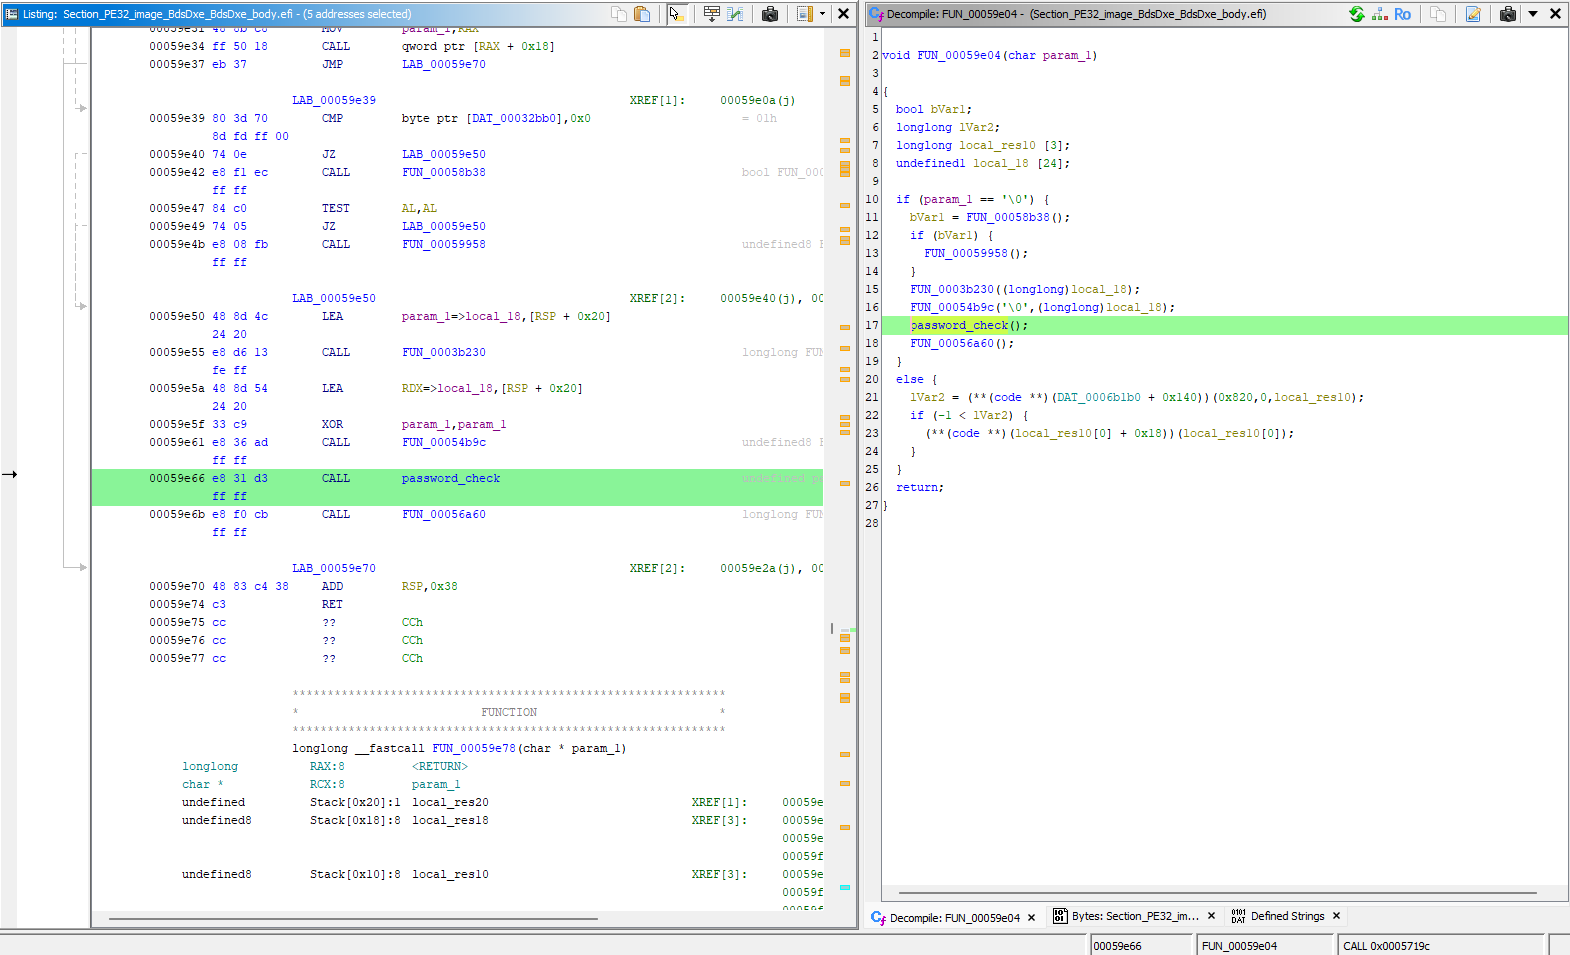
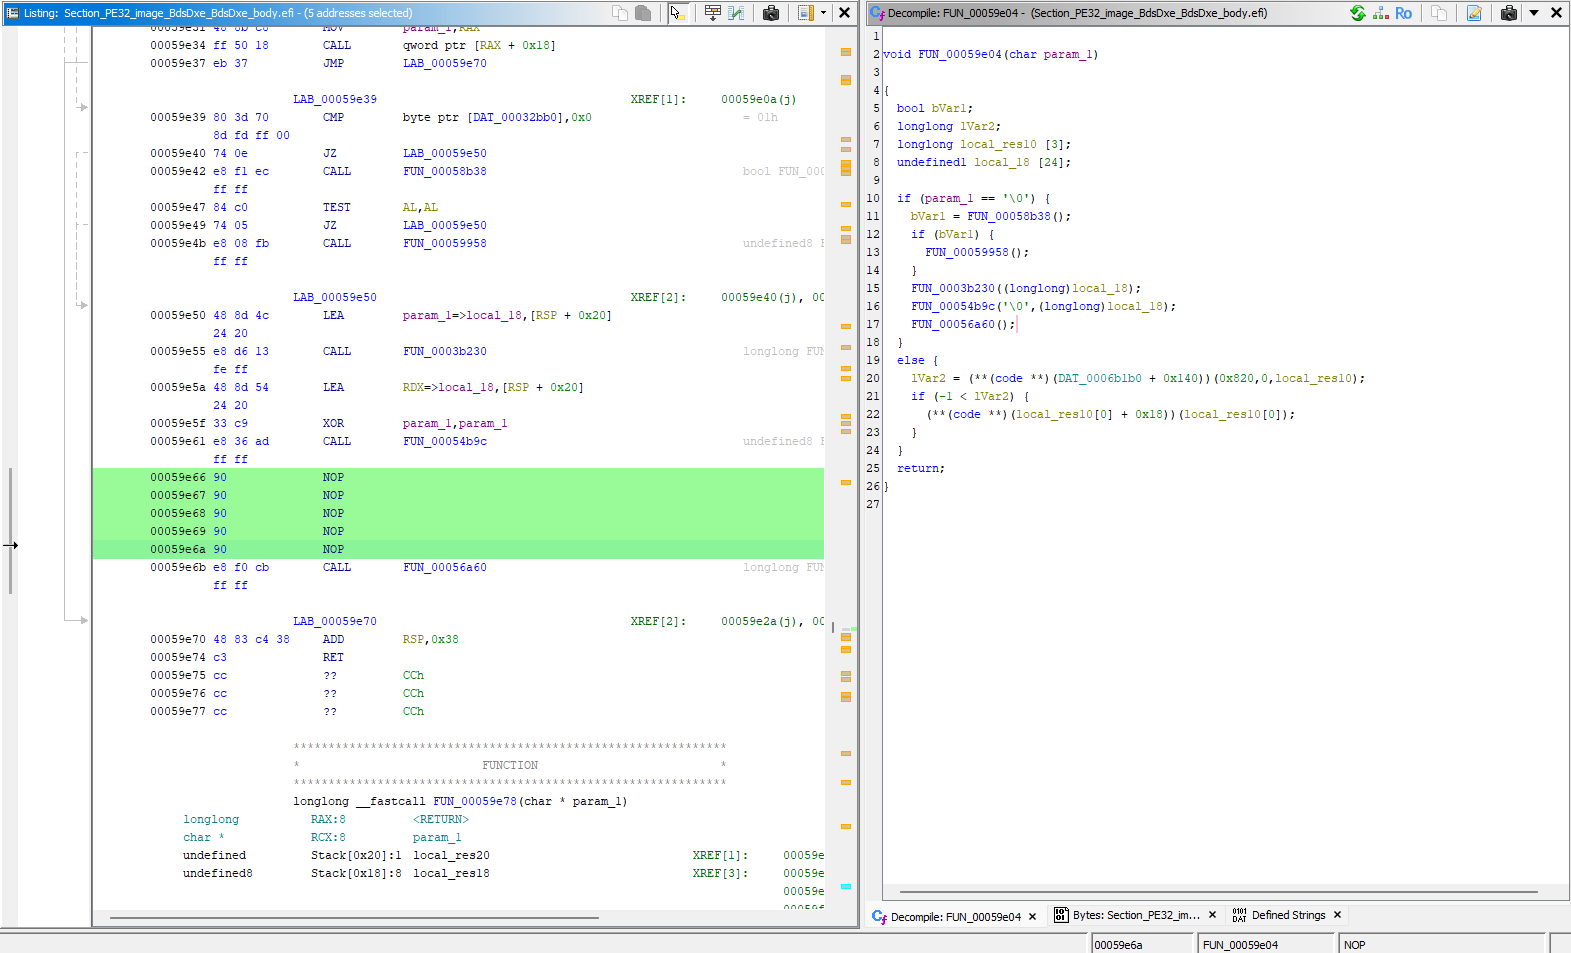
that means we can simply NOP out the entire function call, and be good to go.
 |
 |
|---|---|
| password check call site | nop it out |
i found that patching and exporting with ghidra was a bit finnicky, so i just noted the pattern of bytes to patch, and used a hex editor to do the actual patching.
the modified BdsDxe module is then re-inserted into the bios using H2OEZE - which correctly recalculates the checksums for us.
the patched bios binary is then flashed back to the device and voila - no more password prompt!
How You can Jailbreak Your T70
while i’d love to share the patched bios image, i can’t in good conscience do that.
however, with the knowledge in these posts, you can jailbreak your own T70 - without even opening the case. Watchguard will surely still honor the warranty - right?
- prepare your hardware:
- plug in a bootable usb stick with, for example, ubuntu server 24.04
- connect a network cable OR a wifi adapter (i used a network cable)
- plug in a serial console cable and configure your terminal to 115200 8N1
- interrupt the boot process using
<ESC>and enter the setup utility (something we can do now that we have the password) - in the setup utility, set the following settings:
Boot > Boot ModetoUEFI(needed for ubuntu server)Boot > USB BoottoEnabled(boot from usb)Advanced > Chipset Configuration > Misc Configuration > BIOS LocktoDisabled(allow flashing the bios)
- save changes and reboot, you should now see grub on the serial console
- edit the grub entry to add
console=ttyS0,115200to the kernel command line so you can see the installer output - continue until you see the installer prompt, then exit to the shell via the “help” menu
- install flashrom via
apt install flashrom - dump your current bios via
flashrom -p internal -r bios.bin(do this twice and compare hashes to be sure everything went well), then transfer to a windows computer - open the dumped bios in H20EZE and extract the
BdsDxemodule as a.ffs - open the
.ffsin a hex editor, find and replace the pattern to the function call with NOPs (refer to table below) - save the modified
.ffs - use “replace module” in H20EZE to insert the modified
BdsDxemodule back into the bios - export the modified bios as a
.fdand transfer back to the T70 - flash the modified bios via
flashrom -p internal -w bios.patched.fd - reboot and enter setup utility to verify the password prompt is gone
- (optionall) re-enable
BIOS Lockto prevent accidental flashing
| Product | BIOS Version String | BIOS Dump SHA256 (Get-FileHash bios.fd) |
Password Check Call Pattern | Replace With |
|---|---|---|---|---|
| T55 | 77.05 | 1B13A7CD8D8CBDAEC6C3158AEBF74F8CC3B2D3519202A516A152F3F1FDDBD8A2 |
e8 31 d3 ff ff |
90 90 90 90 90 (5x NOP) |
| T70 | 1.16 | A180292ABD17466B789A437B2758BA702FADB5EA226BCADBDD2DD6266F0D7AEE |
e8 31 d3 ff ff |
90 90 90 90 90 (5x NOP) |