Running Linux on a WatchGuard T70
29 Aug 2025so, i’ve recently got my hands on an old WatchGuard T70 firewall, and i thought it would be a fun project to see if i could get Linux running on it. while it may not be the most powerful, it should still be interesting for running some basic stuff like DNS or network monitoring. since some people managed to boot OpenWRT on it, i figured it couldn’t be that difficult - right?
We do this not because it is easy, but because we thought it would be easy.
- Programmer’s Credo
Hardware Overview
the T70 is based on a Intel Celeron N3160 from ~2016. for a small server, this is still quite usable and most importantly with only 4-6 W TDP, it should be quite power efficient and silent. the 2GB ram is a little limiting, but should still be fine
as for software, the stock OS is some embedded linux variant, but it’s quite locked down and thus not really useful to me. the bios is an more-or-less standard Insyde H20 one, but it’s password protected. sadly, clearing the cmos doesn’t reset the password and most tools online cannot bypass it either. also, as a further annoyance, the bios only allows booting from the internal MSATA ssd (according to some sources online, the spare sata port also works, but i haven’t tested that).
full specs:
- Intel Celeron N3160 CPU (4 cores @ 1.6 GHz)
- 2 GB RAM (DDR3L-1600 soldered to the board)
- 16 GB MSATA SSD
- a spare SATA port
- 4x Intel 1911BFP NICs
- 3x connected directly to GBE ports
- 1x connected to a internal 88E6176 switch IC, which has 5x GBE ports connected to it
- 2x USB 2.0 ports
- Insyde H20 BIOS, password protected, only boots from internal SSD in legacy mode
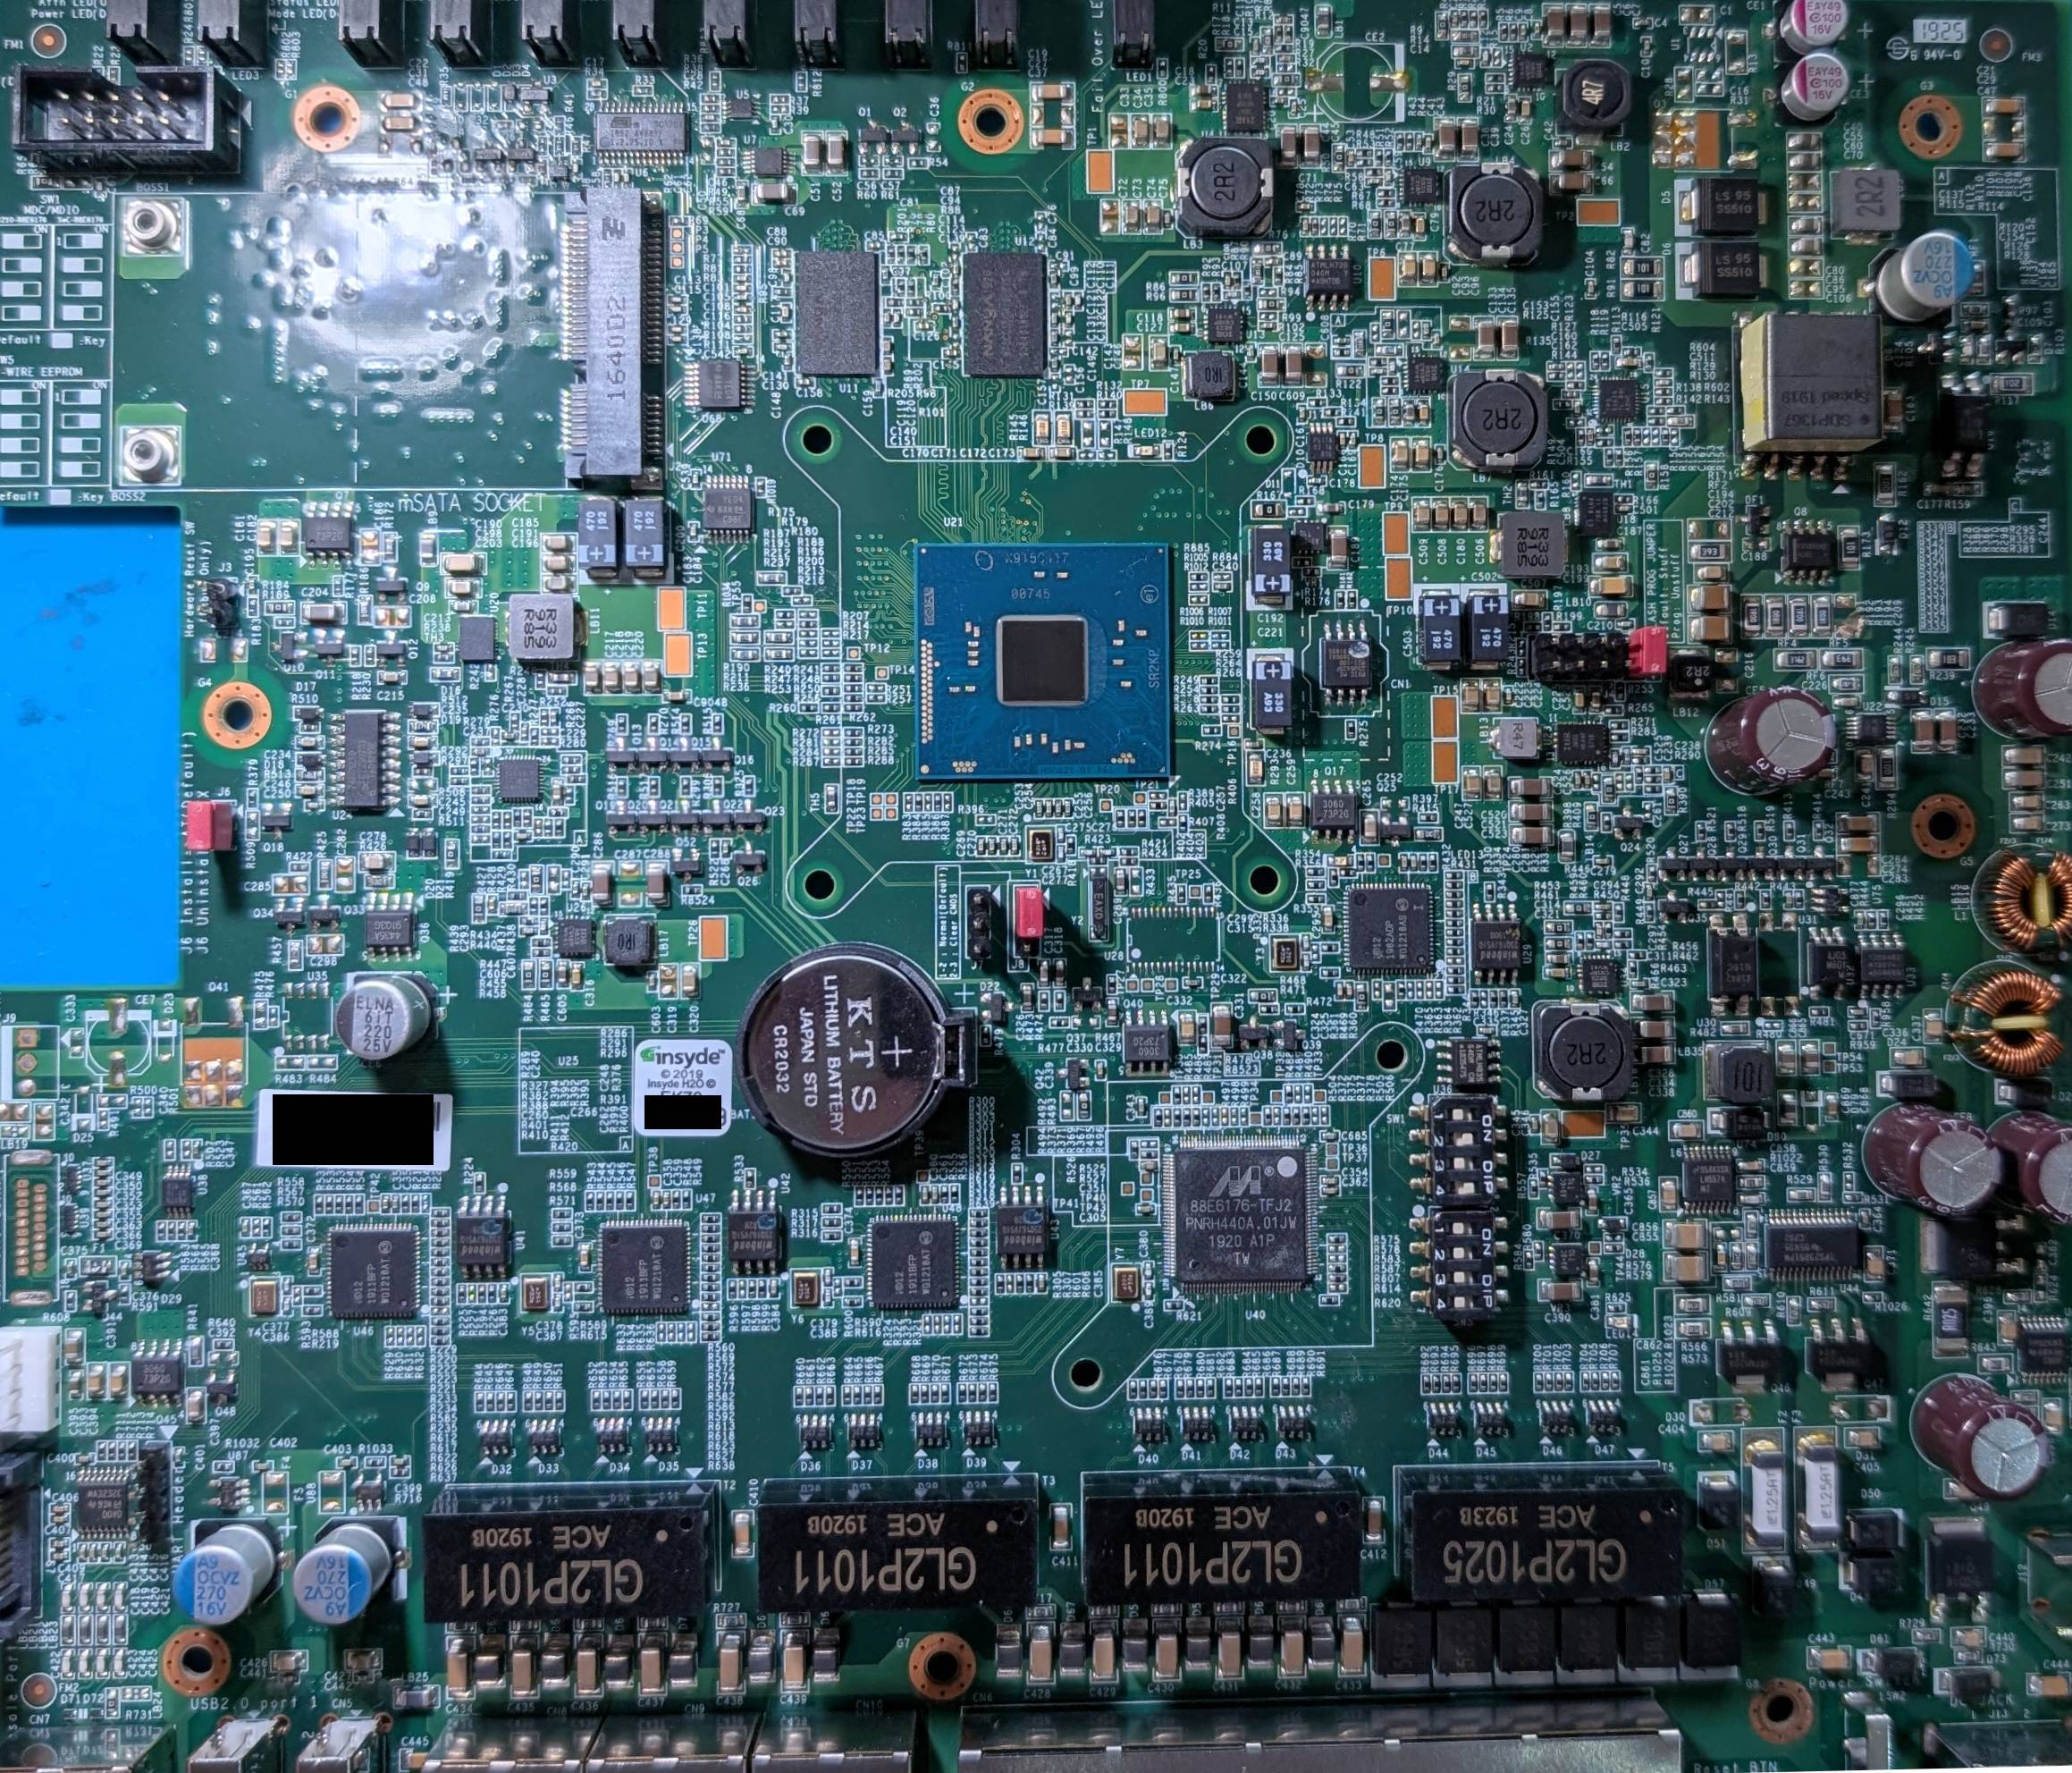 |
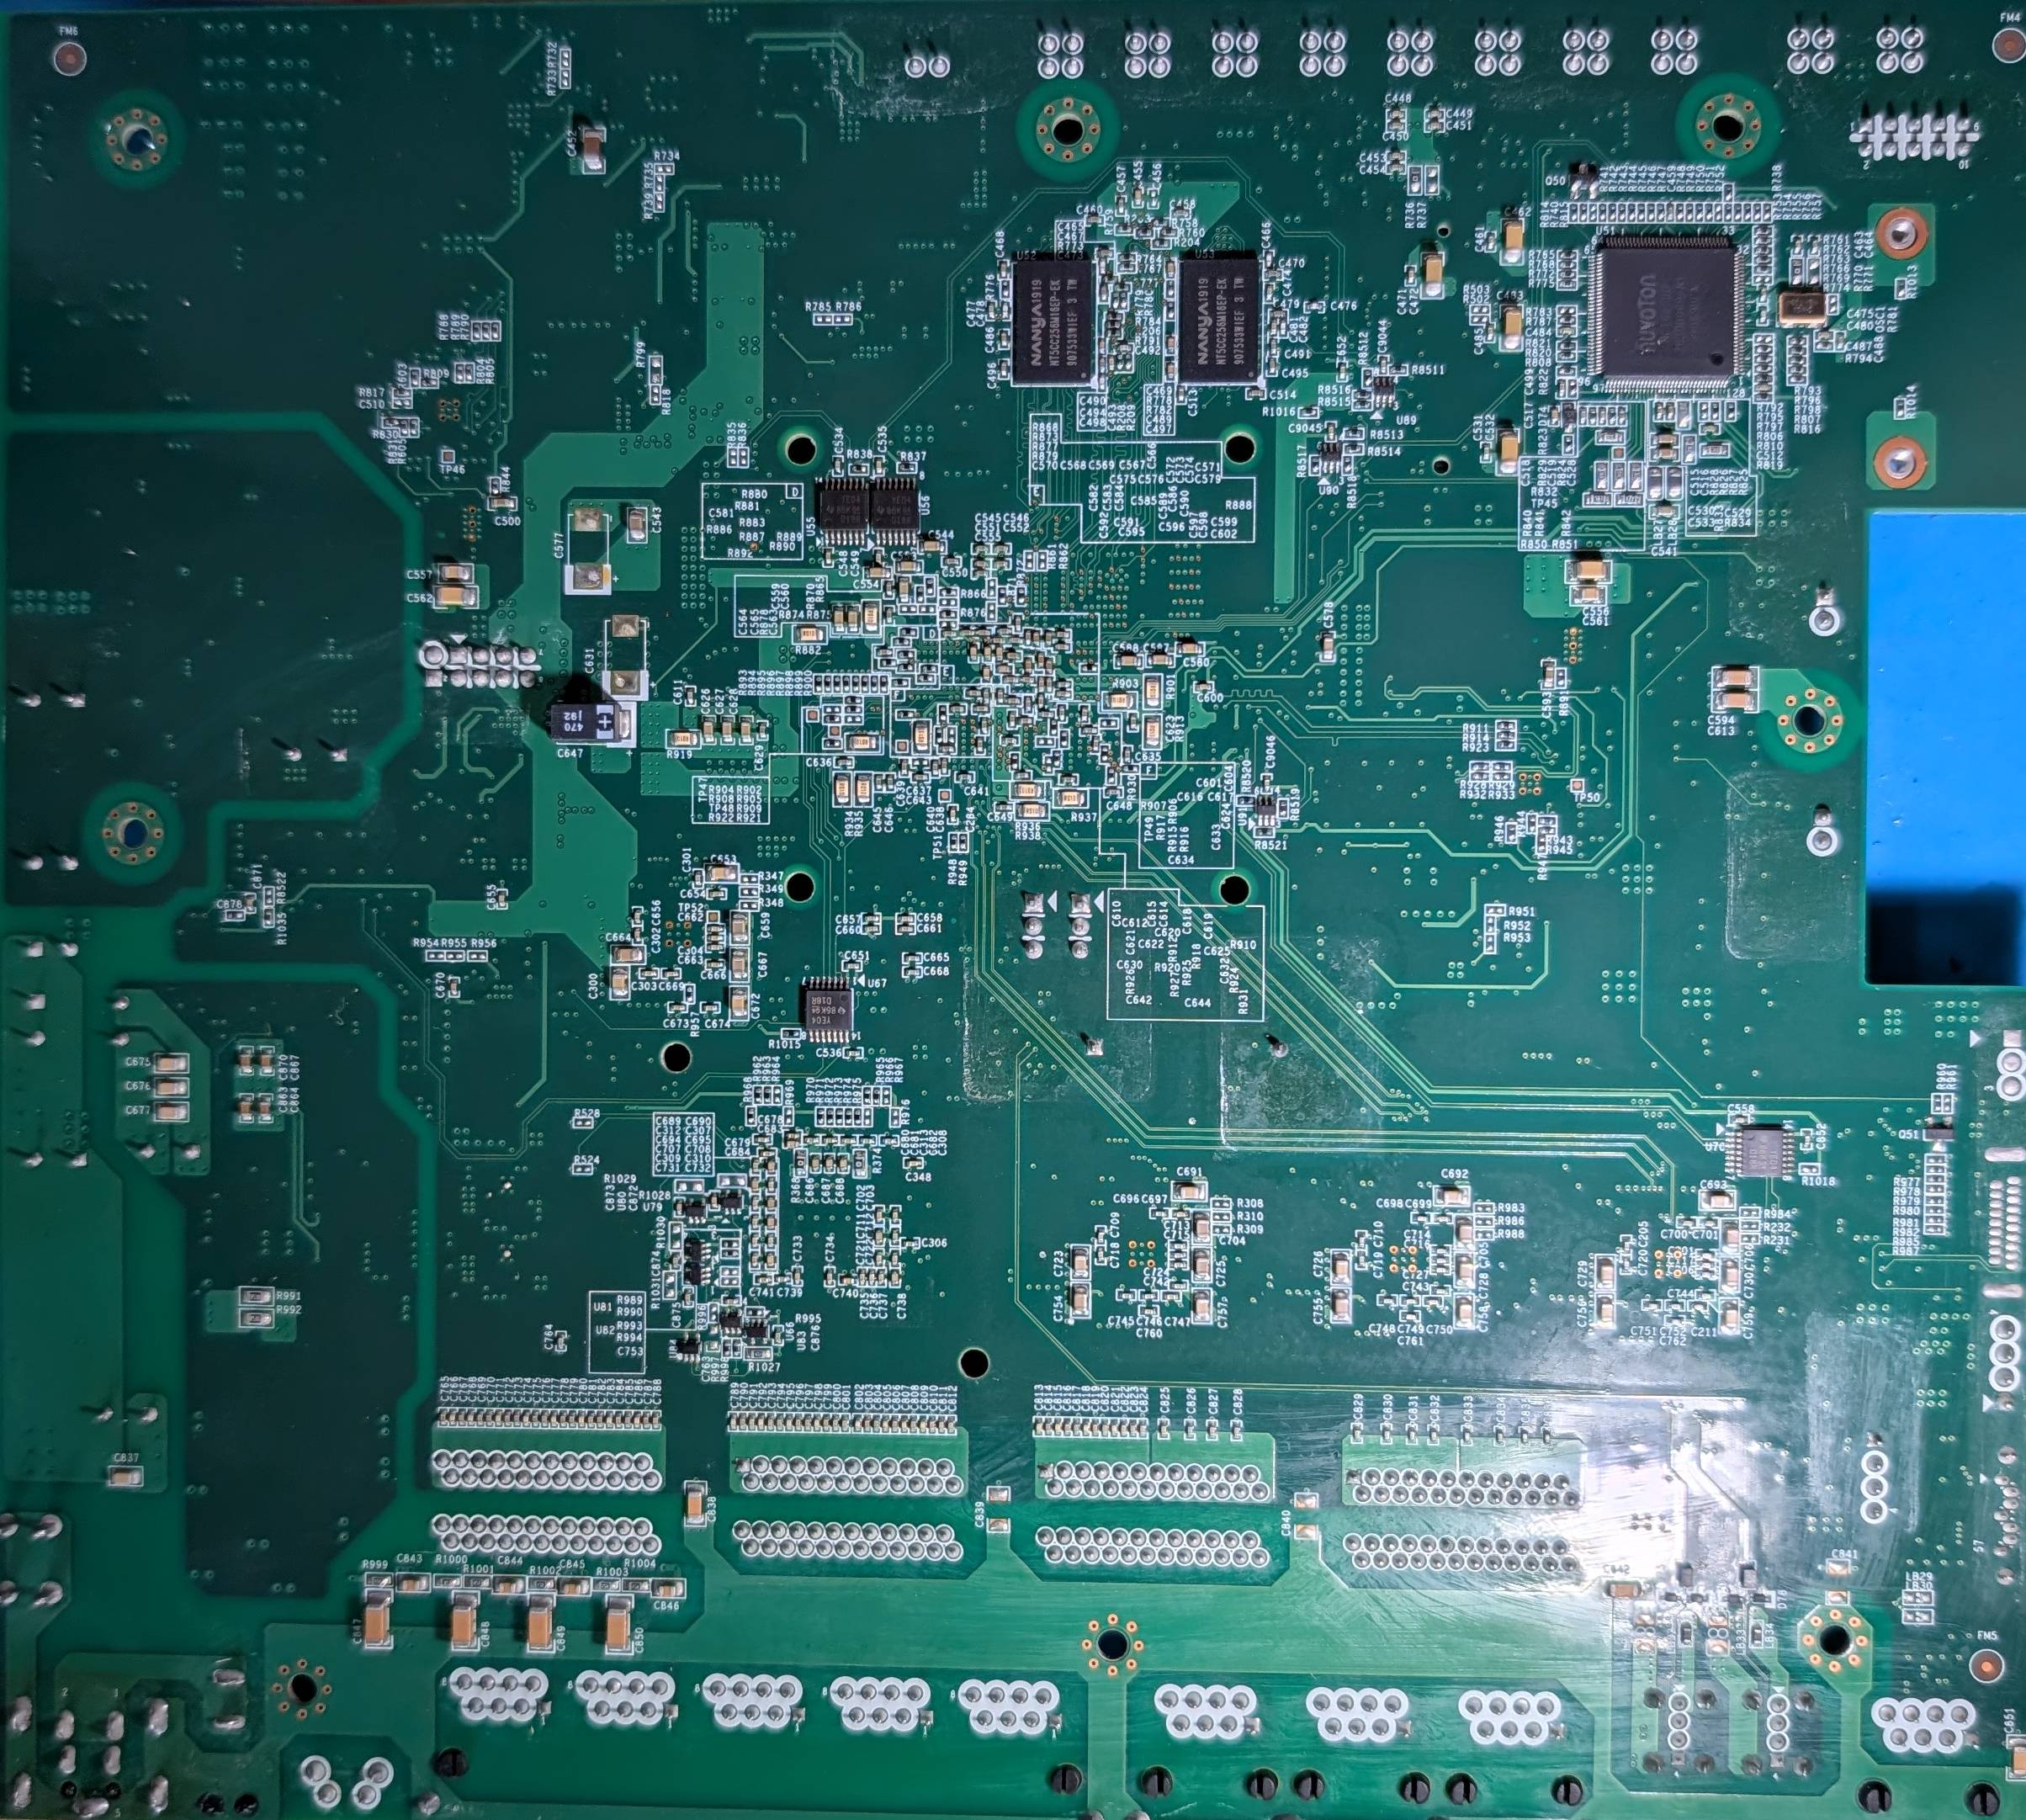 |
|---|---|
| pcb top | pcb bottom |
First Steps: Booting Alpine Linux from USB
this first attempt actually worked pretty easily. while the bios is locked down, i do happen to have a SPI flash programmer, so i simply dumped the bios. from there, a tool called H20EZE can be used to simply change the default settings of the bios. for a start, i simply enabled booting from usb devices. once flashed back, the clear CMOS jumper is used to load the defaults, and thus i could finally boot from a USB stick.
now, since there’s only a serial console, i had to modify the bootloader config and kernel command line, but that’s easy enough (see this guide).
so far so good, but alpine is still quite limited, and i’d rather run something more full featured like Ubuntu Server.
Booting Ubuntu Server from USB
turns out the bios does support UEFI boot, but it’s simply not enabled in the default settings. using the same methods as before, i set the bios to UEFI mode, enabled usb boot, and disabled secure boot. flashed it back, cleared CMOS, and voila - the T70 boots the Ubuntu Server installer from USB just fine.
again, serial console needs to be enabled in grub, but other than that, everything works just fine.
still, i’d rather not have to mess with flashing the bios every time i want to modify a setting. it’s not really practical, is it? so, next step is to bypass the bios password protection or figure out the password.
Accessing the BIOS Setup
WatchGuard, being a seasoned IT security company with hundreds of millions in revenue, of course did their homework here and locked down the bios quite well. they even went out of their way to implement their own password protection, instead of using the built-in Insyde H20 password protection. thus, clearing the CMOS doesn’t reset the password, and the normal backdoor passwords for Insyde H20 don’t work either.
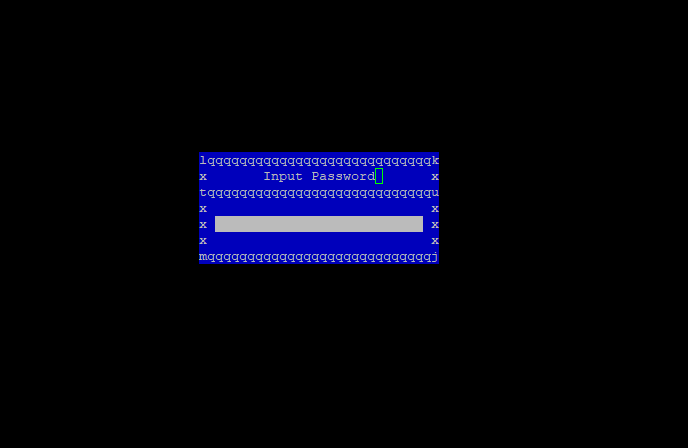 |
|---|
| the dreaded password prompt |
so, how do we get around this?
First Attempt: Poking at the BIOS Modules
yes, this first attempt was a bit naive.
H20EZE has a function to remove bios modules, so i thought
hey, maybe i can just remove the password checking module, and then the bios won’t ask for a password at all
- naive past me
predictably, that didn’t work out. for some modules, there seems to be no effect at all, while for others, the bios simply refuses to boot.
so, onto the next idea.
Second Attempt: Brute Forcing the Password
in hindsight, i think i was just looking for an excuse to not do anything the right way. so, instead of simply booting up ghidra, i wrote a crappy python script that attempts to brute-force the password - over a serial connection at 115200 baud.
yeah, that was a bad idea. since each attempt takes ~0.5 seconds, i’d be sitting here for a bazillion years (estimate) until it finds the password.
 |
|---|
| Ain’t nobody got time for that |
so, no way around it, let’s do things properly now.
Third Attempt: Reverse Engineering the Password Check
searching for the string “Input Password” that appears at the password prompt using UEFITool tells me the string appears in two modules: BdsDxe and SetupUtility.
SetupUtilityis a false lead here, since the string is actually a sub-string of the help text for the stock password protection feature of Insyde H20, which is not used.BdsDxeis what we’re after. it contains the actual password checking code, which is custom made by Watchguard.
UEFITool has a feature to extract the PE image of a uefi module. So let’s load that into Ghidra for analysis.
The Password Check Function
after initial analysis by ghidra, searching for the “Input Password” string gives us a single match - with a single cross-reference to it. that cross reference brings us right to the function that prompts for - and checks - the password.
 |
|---|
| cross reference for “Input Password” in ghidra |
this function truely is a sight to behold. take a look for yourself:
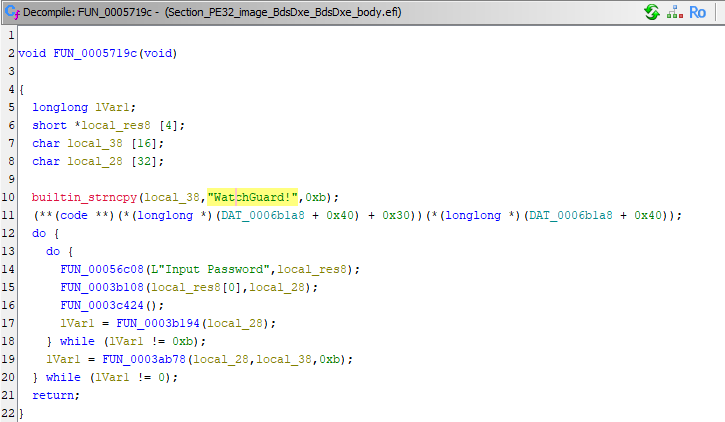 |
 |
|---|---|
| the password check function | the developer who reviewed it |
as you can see, it’s highly secure… well, almost. to be fair, it’s not like this is highly critical to the security of the device, since misusing it requires physical access anyway. but still, i at least expected something involving the serial number of the device or something like that.
let’s clean it up a bit, and see what it does:
void password_check(void)
{
  longlong n;
  short *user_input [4];
  char the_password [16];
  char user_input_ascii [32];

  builtin_strncpy(the_password,"WatchGuard!",0xb);
  (**(code **)(*(longlong *)(DAT_0006b1a8 + 0x40) + 0x30))(*(longlong *)(DAT_0006b1a8 + 0x40));
  do {
    do {
      user_prompt(L"Input Password",user_input);
      likely_utf16_to_ascii(user_input[0],user_input_ascii);
      FUN_0003c424();
      n = strlen(user_input_ascii);
    } while (n != 0xb);
    n = strncmp_with_identity_check(user_input_ascii,the_password,0xb);
  } while (n != 0);
  return;
}
so, how does this work? to figure that out is left as an exercise to the reader. hope you can figure out the password ;)
if you don’t like random passwords sticking around, check out part 2 where i patch the bios to remove the password check entirely.
Exploring the Setup Utility
now we can access the bios setup, so what’s next?
 |
|---|
| i didn’t think i’d get this far |
let’s take a quick look around to see what options are available. turns out, quite a lot of options are available - this is a fairly unlocked InsydeH20 bios. it seems like noone at WatchGuard expected anyone to get this far, so they didn’t bother limiting the options.
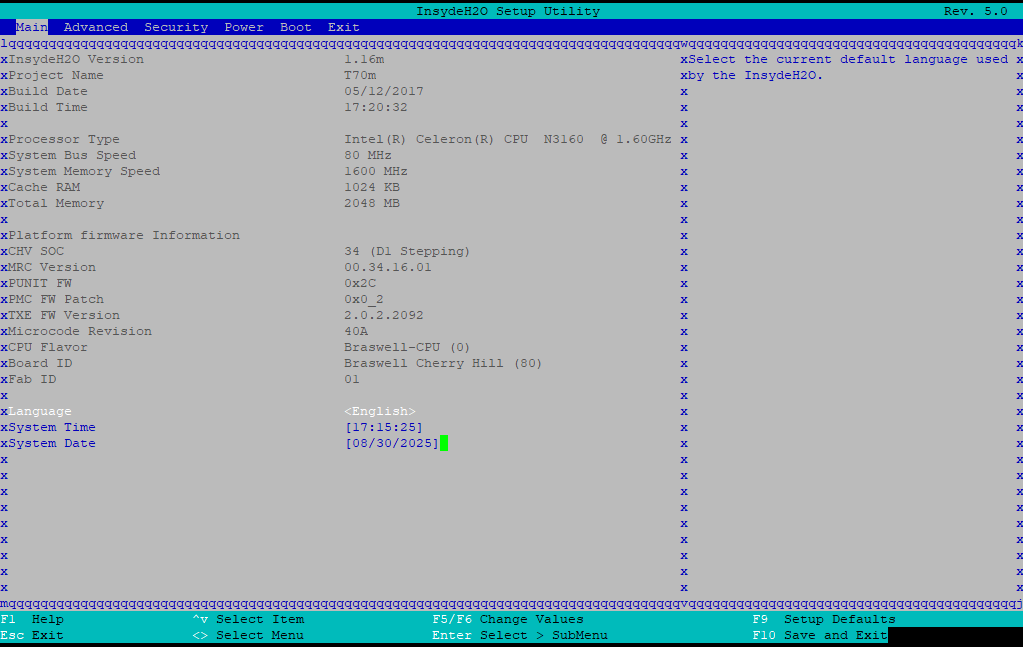 |
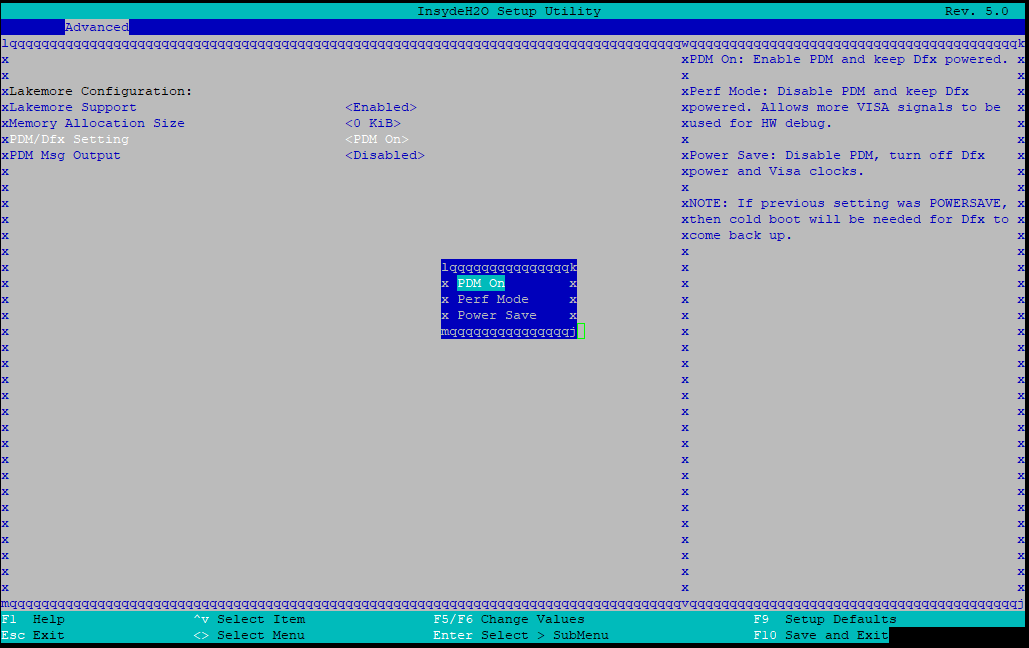 |
|---|---|
| the bios setup main screen | what the hell is a PDM/Dfx? |
also fun: the two OS choices are “Windows” and “Android”. not quite what i’d expect on a firewall appliance (imagine the horror of a Windows firewall).
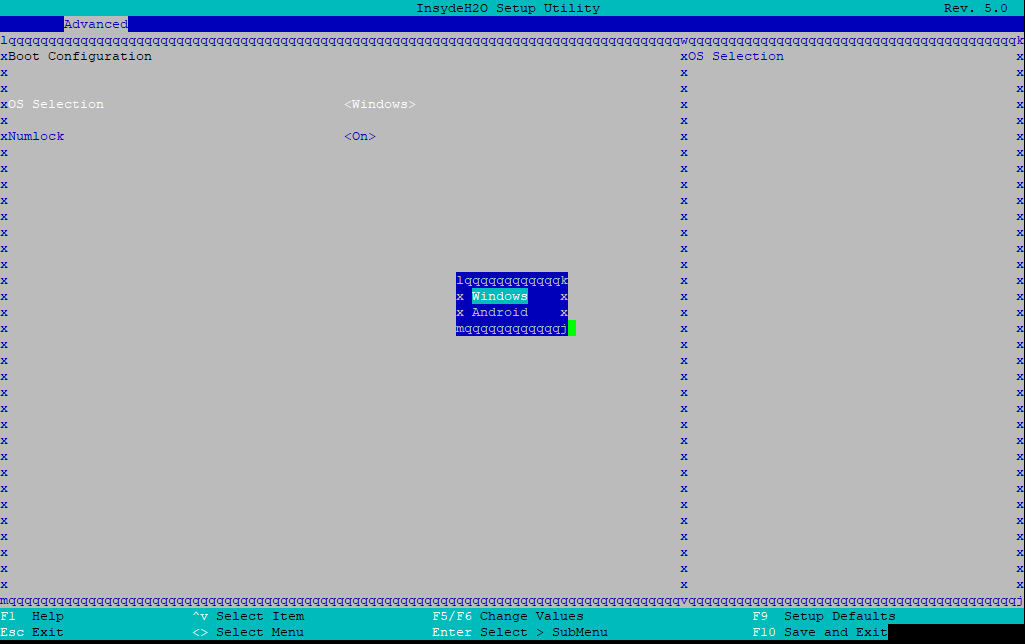 |
 |
|---|---|
| ah yes, the two OSses you’d expect on a firewall | my reaction to the thought of a windows-based firewall |
Side Note: WatchGuard T50
all of the above also applies to the T50, which is basically a T70 with some cut down hardware specs. it uses the same general platform and very similar bios (with the same password). only difference is the CPU (Celeron N3060 instead of N3160) and 3 less GBE ports (on the T50, all 5 ports are handled by a switch IC)